I know...I'm skipping ahead to part 3 of this project...
don't fret,
I'm just waiting on a few supplies to come in
so this is how to decorate the lovely little box your blocks can live in when you are not displaying them
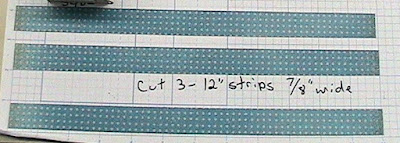
cut 3 strips 7/8" x 12" (you will only need about 1/2 of the last strip)
cut a square 6 1/4"
test it to make sure it fits inside the bottom of the box
adhere.
then start adhering the 7/8" wide strips to the outside of the box
Overlap the strips where they join
I used mod podge overtop the joins
continue till all four side are covered.
I then wrapped the box in ribbon to give it a finished look
don't fret,
I'm just waiting on a few supplies to come in
so this is how to decorate the lovely little box your blocks can live in when you are not displaying them
 |
| From January 5, 2012 |
cut 3 strips 7/8" x 12" (you will only need about 1/2 of the last strip)
 |
| From January 5, 2012 |
cut a square 6 1/4"
test it to make sure it fits inside the bottom of the box
adhere.
 |
| From January 5, 2012 |
then start adhering the 7/8" wide strips to the outside of the box
 |
| From January 5, 2012 |
Overlap the strips where they join
I used mod podge overtop the joins
continue till all four side are covered.
 |
| From January 5, 2012 |
I then wrapped the box in ribbon to give it a finished look
No comments:
Post a Comment
Thank you so much for your comment,
If you would like to order any of these products,
please click on my shopping link at the side.
Thanks, again
Terry Ann